

Step One:
Open up the image you would like to use. I am using this one of Katy Perry:

Step Two:
Go over to your layers tool box and right click on your layer and go down to where it says "scale layer". A box will pop up. You are going to want to add about 300-400 pixels to the width (once you change the width the height should automatically adjust itself.) Depending on your image you may have to mess around with amount of pixels you add. Now, you will notice that the image is bigger then the canvas, to fix that go up to Image>Fit Canvas To Layers.
Step Three:
Now select the rectangle select tool and select everything from the top of the image to down above the tip of her nose like the image below:

Now, right click on your selection. Go down to Select>Invert. Then push Del on your keyboard. You should now be left with an image that looks like this:

Step Four:
Now, we are going to open the exact same image we opened up at the begining of the tutorial. So, go to File>Open and select your image. This image will pop-up in another window. Grab your select tool again and this time we are gonna select from above the nose tip all the way down to the bottom of the image:

Again, right click on the selected are go down to Select>Invert. Then press Del on your keyboard.
Step Five:
Now, go back to the image that we started with. Right click on the selected are. Go to Select>Invert. Now grab the perspective tool and drag the top corners out and the bottom corners in like so:

Now, push Transform on the little box that had popped up. Go over to your layers toolbox and there will be a little anchor at the very bottom. Push that icon to anchor the floating selection.
Step Six:
Now go back over to your other image that we opened and right click on the selected area go down to Select>Invert. Then right click again go to Edit>Copy. Now we are going to paste this in our other image. So, once again.. go back to your other image and go up to Edit>Paste into. Then grab your move tool and move the pasted selection so that it aligns with the nose. Your image should look something similar to this now:

Grab your perspective tool and bring the bottom corners in and the top corners in. Tried to match the two images as closely as possible. If you do this these means less work later. Click transform then go over to your layers tool box and select the anchor icon at the bottom again. Now zoom in closer to your image. Your image should now look like this:

Step Seven:
Now, you'll notice that are lines on the face we are gonna grab our smudge tool and select a fuzzy brush and go to rate and put it to 20. And start going ALL over the face with the smudge tool. You image should now look like this:

We need to now fix where the hair is split into two different sections so grab your clone tool select some hair push Ctrl on your keyboard and right click. Then start clicking over where the hair meets. Here is a before and after of the hair:
**PLEASE NOTE: THE HAIR DOES NOT NEED TO BE COMPLETELY PERFECT AS WE WILL BE PUTTING A TEXTURE OVER THE IMAGE**

Step Eight:
You will notice in my picture that her eyes are a little uneven. So I'm going to grab the rotate tool and make them so they are even. My image now looks like this:

Now to really make her look like a doll! Go up to Filters>Distorts>IWarp. Select grow and click in the center of her eye as many times as you want (until you get the desired look). Do this to both eyes. Now grab the shrink tool and shrink her nose. I clicked on the eyes about 7 times to grow them and 7 times to shrink the nose. Here is my image:

You can also use the shrink tool on her mouth, but I personally prefer using the method below.
Step Nine:
**SKIP THIS STEP IF YOU USED THE SHRINK TOOL ON THE MOUTH**
Go back to the other image we had opened up and go to Select>None. Then grab the rectangle select tool and go around her mouth. Go up to Edit>Copy. Then go back to the original image and go to Edit>Paste Into then grab your move tool and place the selection over her mouth. Then grab the scale tool and make the selection smaller. (you may have to grab the move tool again and move the selection.) Then take your eraser tool and go around the lips. You may also have to use the smudge tool after. Now click the anchor icon in the layers tool box. Your image should look like this:

Step 10:
Now we are going to work on the background. For those of you who don't have a solid background I suggest removing the current background and making a solid one. So, grab your color picker tool then click somewhere on the background then grab your fill tool and fill in any white areas. Then grab your brush tool and fill in anywhere where you may see a crack. Then we are going to crop our image so grab the rectangle select tool and then go up to Image>Crop to Selection. Your image should now look like this:

Step Eleven:
Now we are going to add a texture. I am using this one from http://www.tofurious.com/post-production/grunge-textures/ :
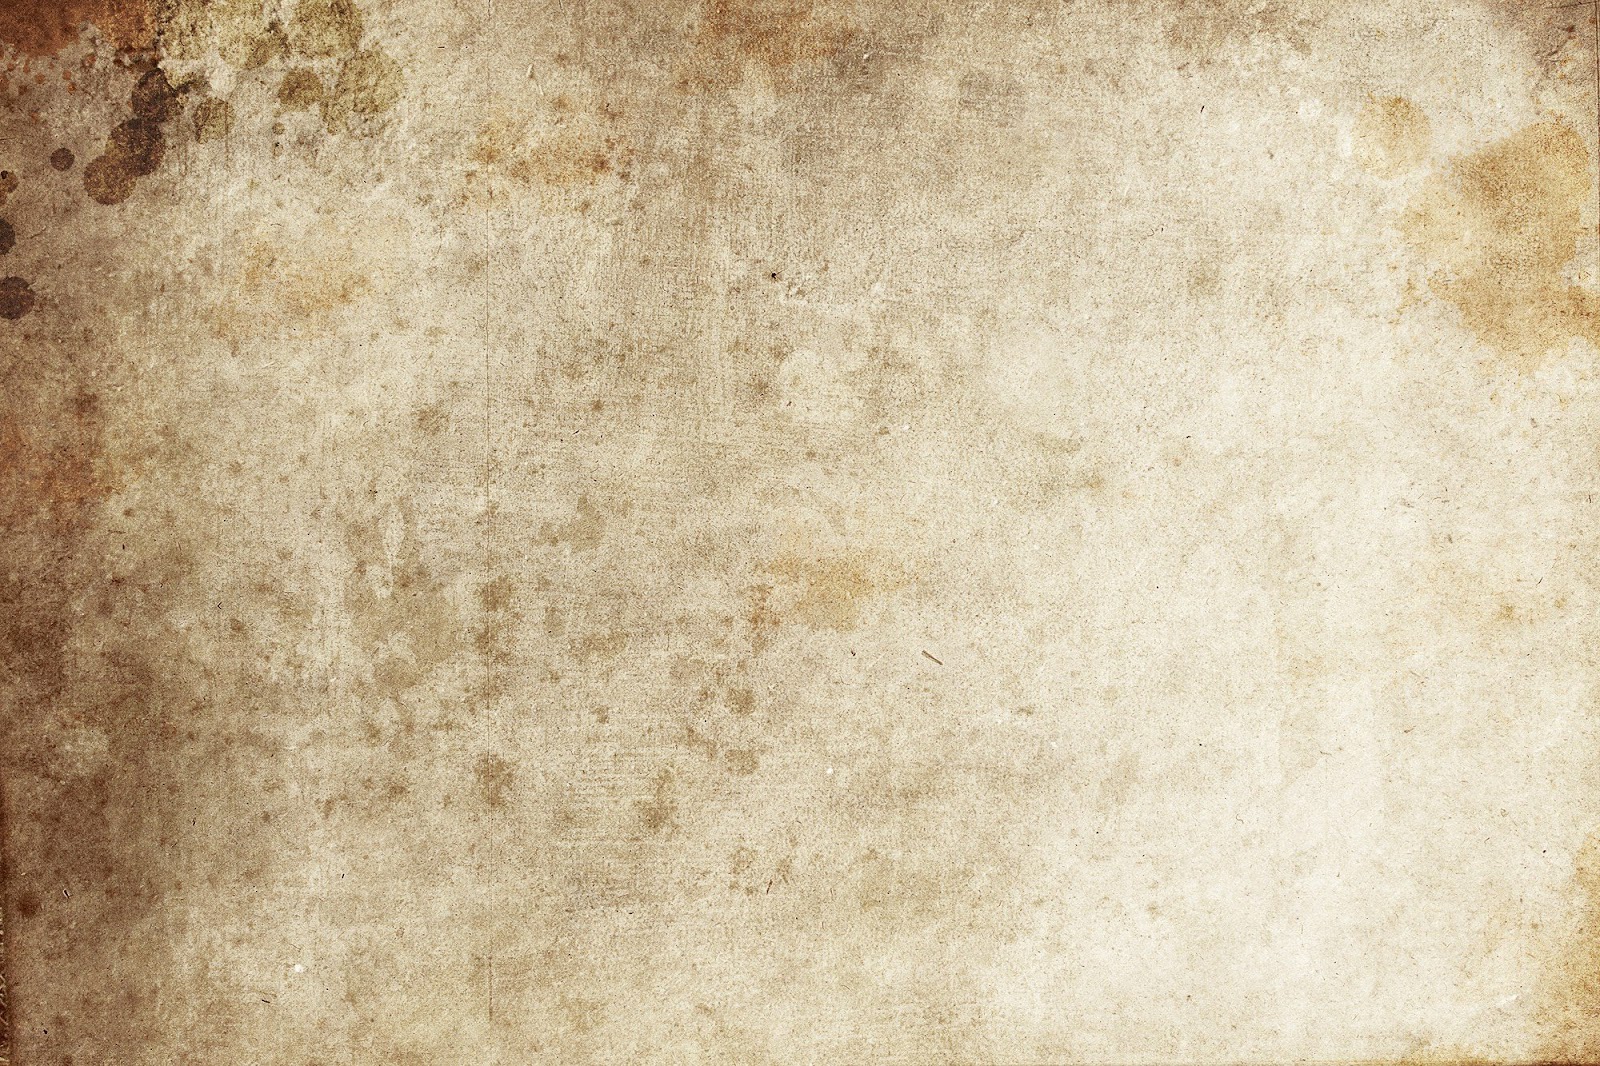
Go to File>Open and open your texture. Then go to Edit>Copy. Go back to your doll image and go to Edit>Paste As>New Layer. Then go to your layers tool box and set the mode to Grain Merge and lower the opacity to your liking. Then right click on the texture layer in the layers tool box and select flatten image. You're done! Here is my outcome:

Need more help? Check out the video tutorial below: