

Step One:
Choose your image. Go to File>Open and select your image. I am using this image of my daughter:

Step Two:
Over in your Toolbox select the "Ellipse Select Tool" then go around of the eyes in your image like so:

Step 3:
Now go back over to your toolbox and select Add to current selection. 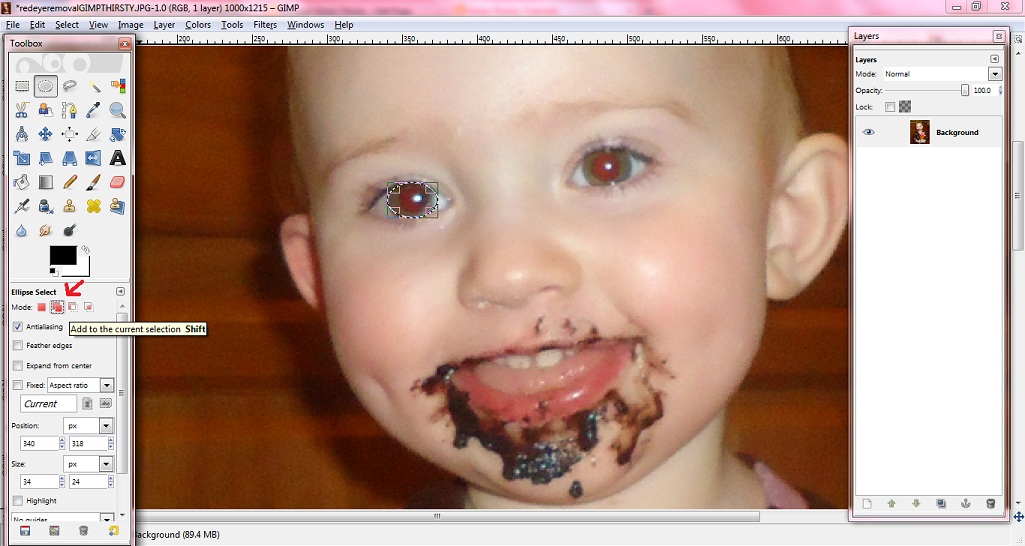
Step 4:
Now go around the second eye. Your image should now look like this:

Step 5:
Go up to Filters>Enhance>Red Eye Removal. A box like this should have popped up:

Increase the number of the threshold until the red eye in the preview image has disappeared then select ok. Now go up to Select>None. And You're Done!
Here is my final image:

Need more help? Watch the video tutorial below: